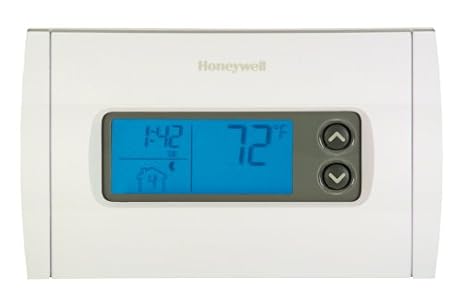
Honeywell Thermostat Program Pins
For the first time ever, Nest has redesigned its iconic smart thermostat. The new Nest Thermostat E basically does the same stuff the old thermostat did, but its. Honeywell RTH9585WF1004W WiFi Smart Color Programmable Thermostat, V. C Wire Required Amazon. Honeywell Thermostat Program Pins' title='Honeywell Thermostat Program Pins' />Wiring Your Radiant System DIY Radiant Floor Heating. Standard Wiring Diagrams for I Link Controllers. Basic single zone controller. Important note There is no direct electrical connection between any I Link Relay and any model of Takagi water heater. The I Link powers the circulator pumps and the flow from the pump, or pumps, activates the Takagi. So. If you have a simple, single zone radiant system and are using the I Link SP 8. Single zone controller activates a pump when thermostat calls for heat. RW. Red or White can go to either terminal. Pushing back the tab above the terminal block allows easy insertion of the wire. NOTE Power to Thermostat on the above schematic indicates 2. AC coming from the controller to energize a digital display on thermostats that do not use batteries for this purpose. The thermostats we sell usebatteries, so this feature is not required for the digital display on our thermostats. But, above all, do not connect a 1. Basic multiple zone controller. Multiple zone systems are generally controlled by a single box containing multiple relays. Like the SP 8. 1 above, the multiple zone controllers use the same basic terminal block configuration for the low voltage thermostat and the line voltage running the circulator pumps. A row of orange tabs along the top of the controller panel allow you to insert the thermostat wires and a block of terminal screws along the bottom labeled N neutral and L load make wiring each zone pump very easy. Of course, in all applications, the relay box must be energized by a 1. Either that, or a branch from an existing circuit can be run to the controller box. Its also a good idea to wire a standard light switch into the controller circuit so that the entire radiant system can be turned off at one central location. If your relay box is wired through a switch, you wont have to rely on the thermostats alone to shut your system off during the cooling season. This feature could prevent someone from toying with your thermostats and sending heat to your floor in the summer. In this example, the thermostat connections are made at the upper row of T, terminals T1, T2, T3, etc. The circulator pumps are wired to the lower, high voltage terminals for zones 1, 2, 3, etc. The lines from the power source circuit panel are connected to N common and L hot. The factory installed jumper is not moved. Below is another example of a multi zone controller, i Link SP 8. In other words, the controller is nothing more than three radiant floor zones, activated by three thermostats. There is no need to use the system pump terminals, no need to use the XX terminals to activate a boiler, and no priority zone for an indirect water heater. The basic wiring is essentially the same for all multiple zone controllers. A multi zone controller may contain from two to six relays, but the wiring procedure stays consistent. Of course, the i Link controller can also be wired for special applications and the most common ones are illustrated below. Special Wiring Diagrams for the i Link Controllers. Certain situations require the i Link controller to do more than simply activate a circulator pump every time a zone calls for heat. The following schematics illustrate three common specialty applications. Activate a boiler with a single zone controller. Single Zone Controller activates a boiler every time a zone calls for heat. The 5 and 6. NO normally open terminals merely close a circuit every time the radiant zone thermostat calls for heat. These terminals do not send any voltage to the boiler. The boiler itself contains a transformer that is activated whenever this circuit is closed. Use the above multi zone schematic if you have more than one zone and you need to use the end switch XX connections on the i Link Controller to activate a boiler whenever any of the radiant zones call for heat. Activate a gas valve from a zone controller. Controller activates gas fired boiler whenever a zone calls for heat. The controller can interface with the existing boiler transformer and activate the gas valve by using the above schematic. Wiring the Heat ExchangerPrimary Loop System. Activating a system pump whenever any zone calls for heat. This is the schematic to use with a Heat Exchanger or Primary Loop system. The pump running the heat exchangerprimary loop is called the system pump. Obviously, it needs to run when any zone calls for heat. The factory installed jumper is left in place. Wiring the Thermostat. Honeywell Pro 1. 00. Thermostat 6 terminalThe Pro Th. But youd never know it by looking at Honeywells INSTALLATION MANUAL. Therefore, we recommend that you use this page and the accompanying photo to make the process quick and simple. STEP 1 Remove the front cover and connect one of your 1. R terminal, and the second wire to the W terminal. The wires are totally interchangeable. But for the sake of simplicity, put the red thermostat wire in the R terminal and the white thermostat wire in the W terminal. STEP 2 Install the 2 AAA batteries and re install the cover. STEP 3 Deactivate the Five minute delay function. This function protects air conditioning compressors from over cycling and is useless for radiant heating purposes. A Deactivate the delay by pressing BOTH toggle buttons and v and holding them for three seconds. This takes you into program mode. B Once in program mode, press both buttons simultaneously and toggle up through the numbers to program mode 5. C The factory setting is 1 5 minute delay on and youll want to set this mode to 0 to deactivate the 5 minute delay feature. D Press the down toggle v button and 0 will display on the screen. E Press both toggle buttons one more time to get out of program mode. The current set point temperature will be displayed. STEP 4 Use the toggle buttons to set the thermostat to any desired temperature. Wire positions for Honeywell Pro 1. Wiring and Set up for the Honeywell Pro 1. Thermostat 8 terminalThe 8 terminal version of the Pro 1. Instead of 2 3 terminal blocks, left and right, this version has 1 vertical 8 terminal block in the middle. It looks like this The set up procedure goes like this STEP 1 Remove the front cover and connect one of your 1. R terminal, and the second wire to the W terminal. The wires are totally interchangeable. But for the sake of simplicity, put the red thermostat wire in the R terminal and the white thermostat wire in the W terminal. STEP 2 Install the 2 AAA batteries and re install the cover. STEP 3 Press BOTH toggle buttons and v for two seconds. This takes you immediately to Function 5. Toggle with the down arrow to set Function 5 at 3. STEP 4 Deactivate the Five minute delay function. This function protects air conditioning compressors from over cycling and is useless for radiant heating purposes. A Pressing BOTH toggle buttons and v jumps you through the various functions. Toggle by pressing both buttons until you reach function 1. Use the down arrow to set this function to 0 zero. Note You wont have to toggle fourteen times to get to function 1. In fact, youll only have to toggle three times. Thats because thermostat designers dont count in sequence like the rest of us. Honeywell 1. 2,0. BTU, Portable Air Conditioner with Remote Control BlackSilv 7. Honeywell Indoor Portable Evaporative Air Cooler. Honeywell Indoor Portable Evaporative Air Cooler with Remote Control. You just returned home after playing two grueling sets of tennis. Radio Code Generator there. Grab a drink, find your favorite chair and let this energy efficient cooler revive you. Four fan speeds and oscillating louvers evenly distribute cool air, and the rbuy now.